M O D I F I C A T I O N S : Airfilters -- Installing a K&N 57i kit
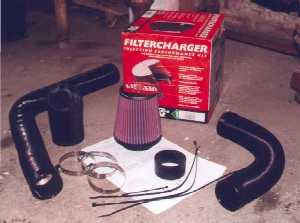
I ordered my Kit at Kinnor (ask for Lesley, who visited the BBS regularly). The contents of the kit are shown in the first picture.
As this was our first real modification to our MGF, I was a bit nervous. So after printing out several DIY guides I felt ready for the installation. Maybe it's your turn now, so go ahead.... it's really easy. So take your time and enjoy your work and the magnificent sound of the filter afterwards.
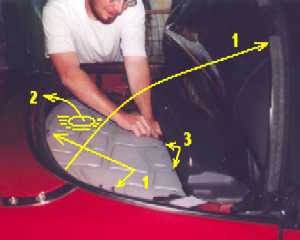 |
Installing the K&N 57i kit 1.
By losening the clips (the ones that hold the softtop in place) from inside
the car, the hood can be placed in a vertical position. Maybe you need
a rope to secure it in that position. |
 |
Removing the airbox. No particular way to do this, but start with opening the airbox and continue with removing part by part. On the picture you can see what needs to be removed. |
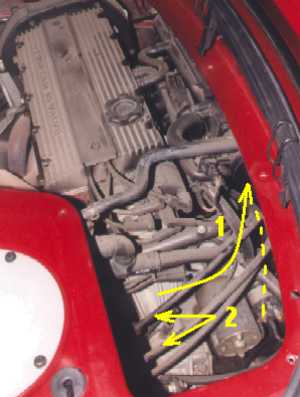 |
The engine bay without an airfilter, with an open throttle body (1) and the location where the two pipes will come (2). Continue with the
assembly.... Use the jubilee rings to tighten the pipe onto the throttle
body. Install the airfeeding
pipes and lead them to the underside of the car. Maybe the manual suggests
to lead them to the side intake vent, but that isn't the best place to
pick up air or to benefit from For safety reasons, don't connect the pipes to the hydragas piping at the bottom of the car. You don't want these to be damaged.
|
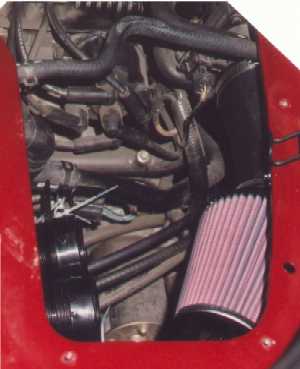 |
At this point the kit is installed. Very clearly visible are the airfilter, the 6-inch hose attached to the throttle body and the two pipes, providing fresh air to the filter (and engine). The distance between the opening of the pipes and the filter must be at least 10cm. Important note: don't overtighten the julbilee rings, it could damage the throttle body, with some nasty effects as a result. *
especially on the cars with the 48mm black plastic throttle body. |
additional: the K&N
heat shield
additional: the Tom Randell bracket